Controller Troubleshooting
Table of Contents
- Check the manual!
- Replacing buttons, springs and switches
- My buttons are stuck!
- My switches are double clicking!
- Bonus: Adding stickers to your buttons!
- (Yuancon) My knobs feel too loose/tight!
- (Yuancon) My USB-C port malfunctioned!
- Known software-related issues
- Resources
This guide assumes you are talking about an arcade-size controller that allows customization.
Check the manual!
The manual that came with your freshly arrived controller should contain most of the important information you need, like changing modes or hardware specifications. This guide is dedicated to troubleshooting and explaining procedures not explicitly mentioned in the manual.
If you lost the manual, here are some of the common controllers manuals:
Replacing buttons, springs and switches
Video guide by Sungblox
Video guide by Tokaku
Replacing your buttons, springs, and switches all require you to open the back plate of your controller. Most controllers have their back plate screwed to the body, so you will need a screwdriver to remove it. For the Faucetwo controller, the back plate is attached using magnets, so you can simply pinch and pull it out.
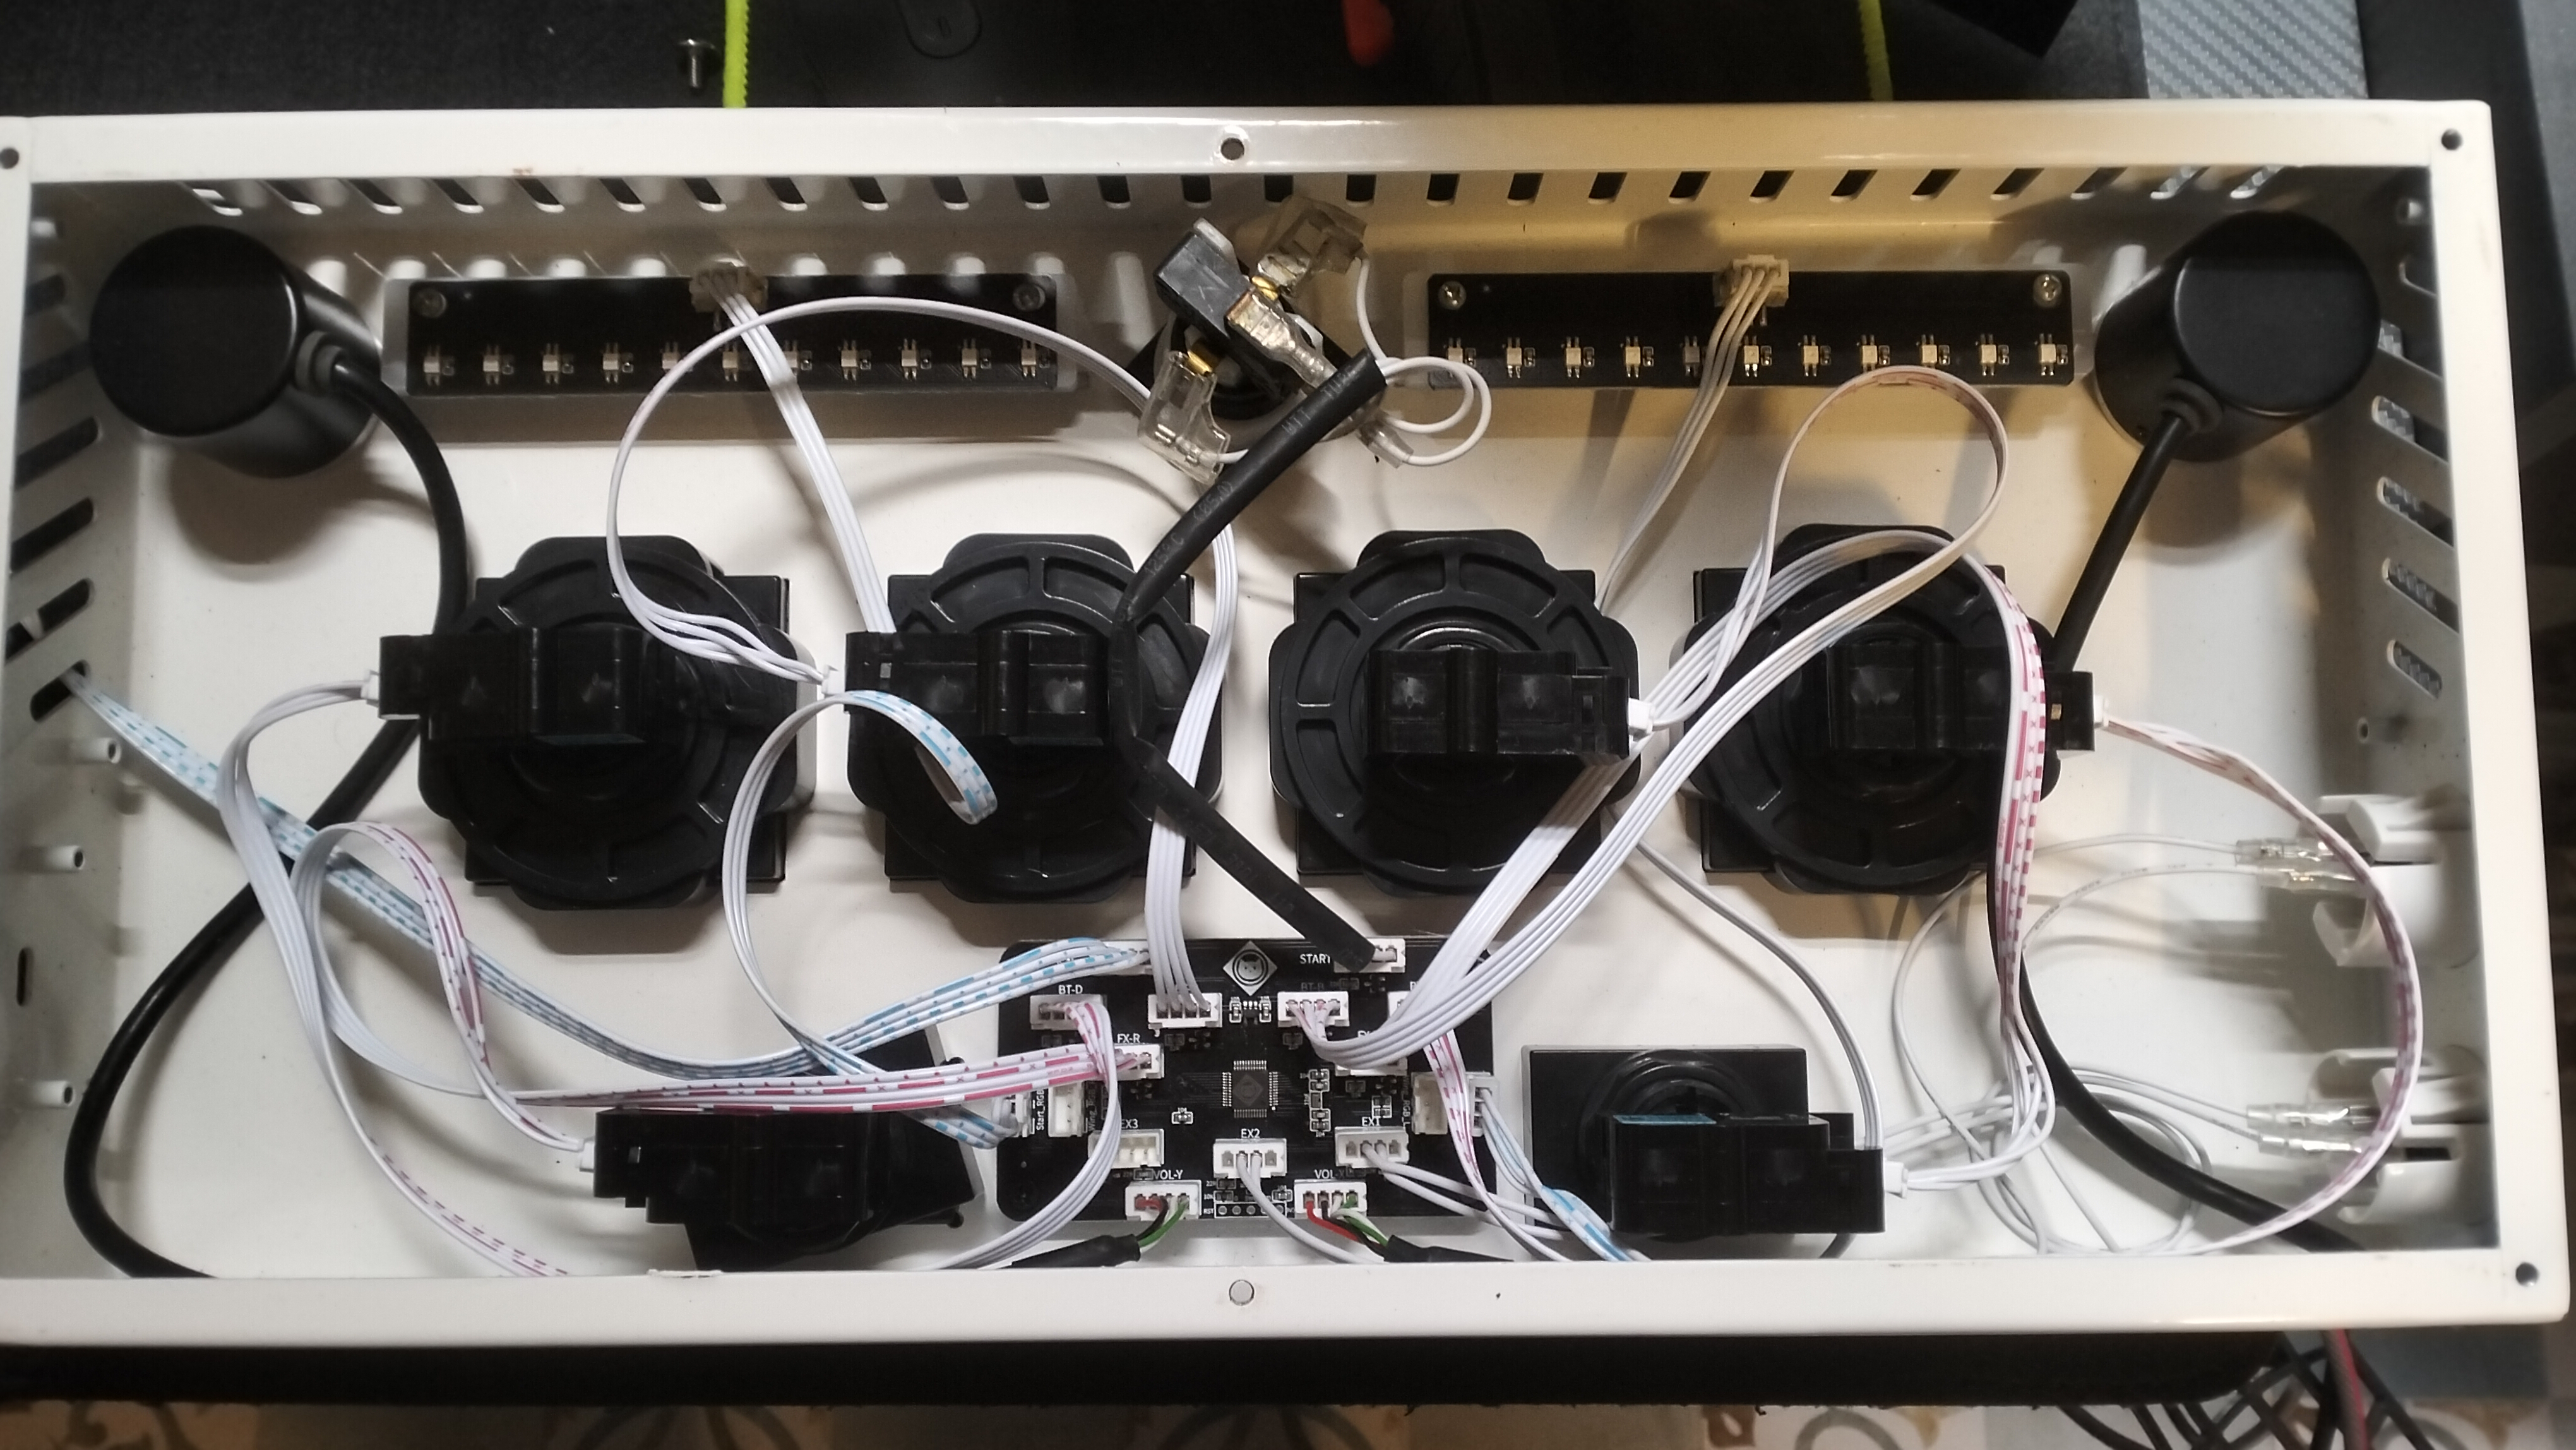
The interior of the controller might look sophisticated, but it simply consists of a PCB (the board in the middle) connected to 7 buttons and 2 encoders using 4-pin JST wires. More accurately, the PCB is connected to the microswitches of the buttons rather than the buttons themselves.
Replacing switches
While still having the wires attached, you can pull out the switches from the buttons by twisting them anticlockwise (to the left).
For Omron switches, there should be 4 wires connecting to 4 heads — 2 for the switches and 2 for the LEDs. The heads of the LED holders are at the sides of the switches, and the other two heads belong to the switches themselves. Pull out the two wires connecting to these two heads (you don’t have to remember which wire belongs to which head). You will also need to separate the LED holders from the switches — Video link . At this point, the switches should be detached and you can swap them with your desired ones. Attaching them back by reconnecting the wires, the LED holders, and putting them back into the buttons.
For OBSA-LHS1F switches, they should be connected using 4-pin JST connectors, so you can simply pull the connectors out, swap the switches, and put them back, as long as you remember the corresponding pins.
If your controllers didn’t come with dedicated wires for OBSA-LHS1F switches, you will need to learn which pins are connected to which between the switches and the PCB here . After that, purchase a set of 4-pin female to female JST wires and rearrange the pins. Messing up this part can cause a short circuit.
Replacing buttons and springs
This section requires you to again pull the switches out, but you can keep the wires attached. The buttons are generally secured using threaded rings, so you need to unscrew them to remove and replace the buttons.
Replacing springs is harder to explain using words, so here’s a video instruction .
My buttons are stuck!
Usually, buttons are stuck due to misplaced springs or dust preventing the buttons from moving smoothly. Either way, you will need to remove the white parts of the buttons (similar to the step where you remove the springs) and reposition the springs, as well as remove any dust or residue by cleaning with a cloth.
My switches are double clicking!
There is a chance that your switches are malfunctioning and should be replaced. Often though, it is just dust or gunk. Before getting new switches try pulling them out, detaching the wires, and firmly cleaning the head using a cloth!
I also want to point out that OBSA-LHS1F switches seem to be more prone to double clicking than Omron ones.
Bonus: Adding stickers to your buttons!
Since the “stickers” can be secured by the buttons themselves, you can design your own sets and print them out using normal paper. For most buttons in the market, the dimensions are as follows:
- BT: 44×44 mm to 45×45 mm
- FX: 44×22 mm to 45×22 mm
- Start: 22×22 mm to 23×23 mm
(Yuancon) My knobs feel too loose/tight!
You will need a hex screwdriver, which should have come with your controller. If not, you can easily find one in any electronics shop.
Unscrew the nuts on the side of the knobs to remove them from the encoders. You should see a rubber ring wrapped around the stud, gripping the plate to create friction. Slightly raise it to loosen and press it to tighten.
(Yuancon) My USB-C port malfunctioned!
It’s recommended to just contact the manufacturers for replacement parts. If not, you can get a generic USB-C daughterboard which supports 4-pin JST connection.
Known software-related issues
Faucetwo USC Compatibility: Any Keyboard Modes were reported to have input issues, therefore using mainly eAcloud Mode (BT-A Mode) is encouraged for Konasute, USC, and KSM use. If issues arise, you can also use HID Joystick mode (BT-B mode)
Yuancon Konasute Compatibility: As of writing, only BT-C Mode is encouraged.
Resources
Rhythm game controller wiki . Contains useful and comprehensive controller information.